|
Transparent Sims2 |
![]()
|
|
|
||
|
|
Advanced object transparency tutorial version1
This tutorial was written using the following;
Simpe version 0.48alpha
JASC Paint Shop Pro version 8
The gimp will work
The Sims 2 University installed
Works with Nightlife as well
There’s no reason that I know of at the moment why this can not be achieved with out Sims University installed or Nightlife
First of all some rules
A. After any changes always commit and save
B. Please do not publish this tutorial on any pay site
C. Any body that wants to help by translating to another language is most welcome
D. Any comments or advice welcome
E. Any info on other graphics editors that are usable with this tutorial would help
For example turning the Colonial ComboClean by Imperial plumbing works Bath. So that you get rid of most of the curtain. leaving the tub & bamboo behind.
1. Open Simpe
2. Click on Tools
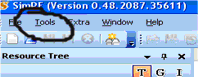
Then select object creation then object workshop
Select plumbing
Find the Colonial ComboClean by Imperial plumbing works
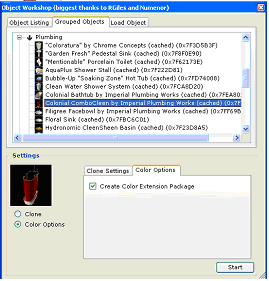
3. Keep the settings as you see above
4. Click start read the warning that pops up & name and save your project to a folder of your choice but remember where it is.
5. Now to get those bits to stay invisible out of the way select material definition
If you have been through the first tutorial you will notice some differences there are now more files to identify. The files we are interested in are the last two in the list the ones that say curtains in the name. The others at the top are for the tub clean & dirty, the third is the rim of the tub. We want the 4TH & 5TH.
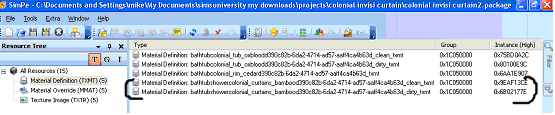
So click on the 4TH
6. Underneath in plugin view change this value from none to blend (just type blend in to the value box) click commit & save the file. Then repeat for the 5TH.
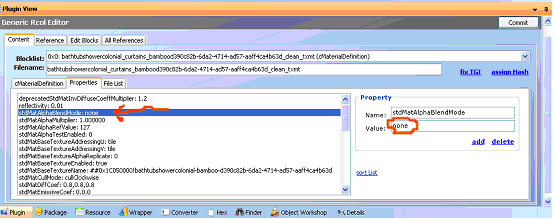
This is what controls the alpha channel if it’s not set to blend you’ll more than likely end up with black where you intended to have transparent.
7. Now we need to identify the image files we need. Again it’s the last two in the list
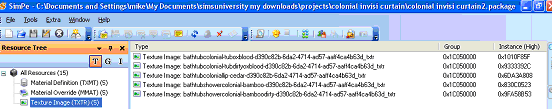
So click on the 4TH image
Go down to the plug in view
This DXT1 FORMAT needs to be changed to DXT3 just click on the blue down arrow to select DXT3 click commit, right click on the image and select update all sizes click commit and save. Now repeat for the 5TH image

8. Now for the fun artistic bits. You need to export the image
![]()
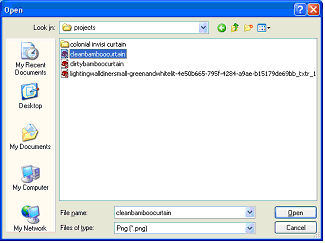
So click that export button a window will appear:
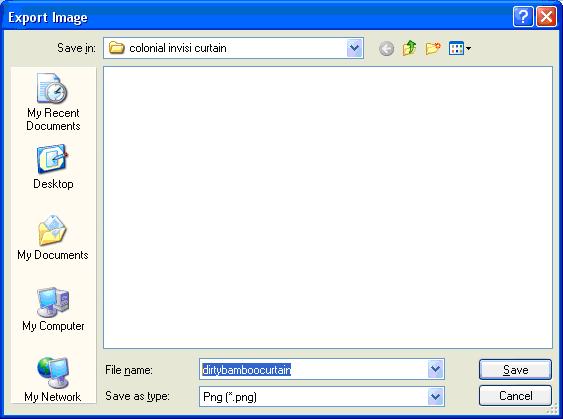
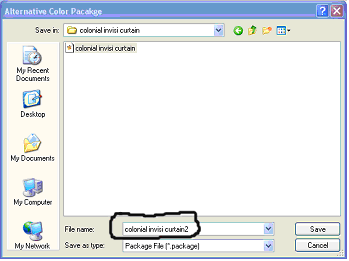
Give this file a name you will find easy like I did: make sure it saves with a png format preferably in the folder which you chose at the beginning. Don’t forget when you finish with your graphics editor to save in the png format
8a Open the image file in an
external programme like jasc paintshop pro.
And use your skills to
remove the bits you don’t want.
Guess what you got to repeat again for the 5TH image
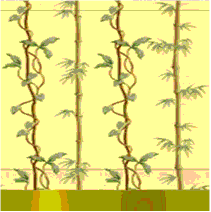
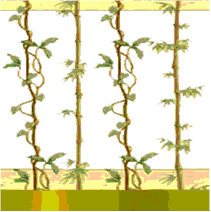
9. The picture on the left below is what you should have. The one on the right is what you are aiming to produce the white area is what will appear transparent in the game as you can see I took away some of the yellow to leave the bamboo. If you have followed all the steps so far and using JASC paint shop pro, (the areas you scrub out will show as a checker board in the actual editor its different here because MSword wont handle the png format when pasting into the document).
Don’t forget to edit the other image file.
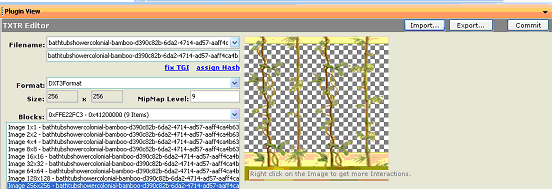
10. OK now that you have tried your artistic skills you need to get your graphic back in to simpe. in plugin view click import. Please ignore the fact that I’m lazy just take no notice of the export button that’s highlighted in this image.
![]()
Select the image that you edited the one you gave a meaningful name (don’t forget the check for png file format)
In simpe you should see:
Notice the checkerboard effect? If you see this then you are doing very well it means you have a much higher chance at success of the object having some transparency. (at the time of writing this tutorial, this does appear when using JASC paint shop pro) click commit and save then right click on the image and select update all images click commit and save. If you click the line above the one as you can see above that’s highlighted blue click each of the ones above to verify that all sizes have been updated this is very important also .
Guess what you got to repeat this for the 5TH image as well
11. Now all you need to do is place the file into your games downloads folder and see how it looks in the game.
=============================================================
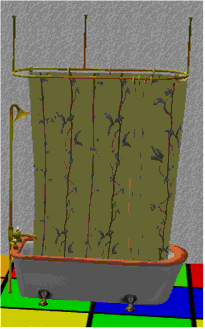
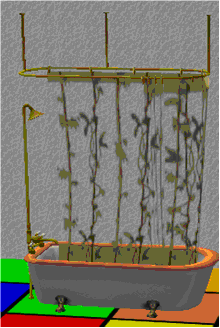
If you have been successful you should get the above the one on the left is the original game version the one on the right is what you should get if you are successful.
“Trademarks are the property of Electronic Arts Inc. and its licensors. Game content and materials copyright Electronic Arts Inc. and its licensors. All rights reserved.” This Site & content is not endorsed or approved by EA .

